TUTORIAL: Scrivener 3 Binder Icons
Woohoo! Let’s talk about Scrivener!
Hey friends! I'm so excited to bring my Scrivener tips and tricks to you! Scrivener can be pretty daunting, but it's such a great program with so many features!
PDF coming soon!
(sign up HERE to be notified when it's available!)
This video today is all about the Binder Icons features. These are all pretty great, so pay attention!
In this post, we'll go through the following topics:
The Binder
Change Icon Menu
Icon From Text
Managing Custom Icons
Reset to Default
The Binder
The Binder is this panel on the far left of the Scrivener window. It’s essentially how you navigate your manuscript!
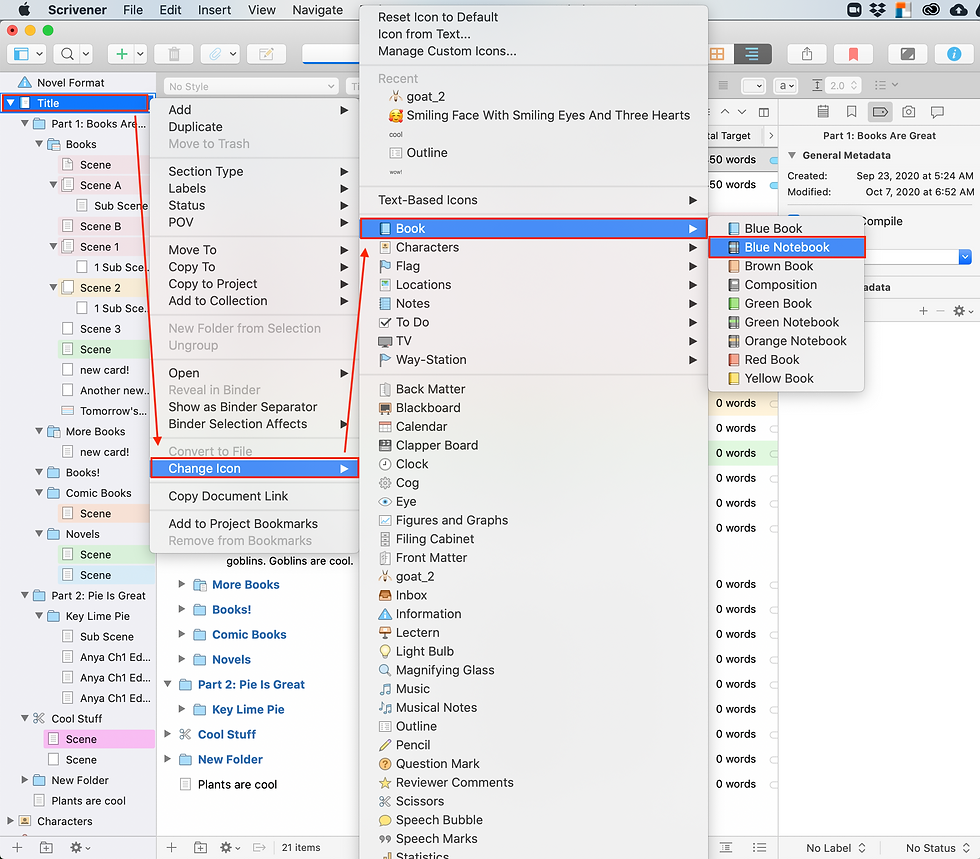
You can change the way your Binder looks by changing the icons for the folders and text documents!
Change Icon Menu
To change icons, right click on whichever folder or document you want to change. Down toward the bottom of the menu will be the option to change icons. For this one, I'm going to change my title icon to a blue notebook!

Icon From Text
You can create an icon that is text!

Open up the change icon menu and select Icon From Text. These windows will pop up.

You can select the emoji you want and drag+drop it to the selection window.
Or you can type in a (very short!) word and that will become an icon.


Managing Custom Icons
You can also upload new images as icons. Open the change icon menu and select Manage Custom Icons. This window will pop up.

Click the plus sign and upload a picture from your computer. Make sure to compress the file first!

Then open the Change Icon menu again, and your new icon will be included alphabetically with the rest of the preloaded icons!

Reset to Default
So what if you mess around with all your icons and then decide you hate it? Are you stuck with that WOW icon forever?
Nope!

Blam! Now your icon is back to normal. High five!
That’s all from me! I hope your Binder is beautiful now!
Did you enjoy this post?
Sharing is caring!
Share this post to your social media,
Or save the image below to Pinterest!

.png)


Comments